When it comes to mixing and mastering inside FL Studio, there are a few mixing and mastering techniques and processes that may make any style of music production mastering process a lot easier. Also, there is no right or wrong, as the whole process is creative.
Here at ProducersBuzz, we wanted to outline the best way to set up any music production project for mixing and mastering.
This is to make the whole mixing and mastering process inside FL Studio a lot easier and more straightforward.
Here is the main outline of this FL Studio tutorial guide.
- Number the channel rack instruments and samples correctly.
- Rename the channel rack stack instruments and samples to identify them easier.
- Color-code your instruments and drum samples within the channel rack.
- Automatically assign the whole channel rack to a “new instrumental track.”
- Separate the instruments and drum samples inside the FL Studio mixer.
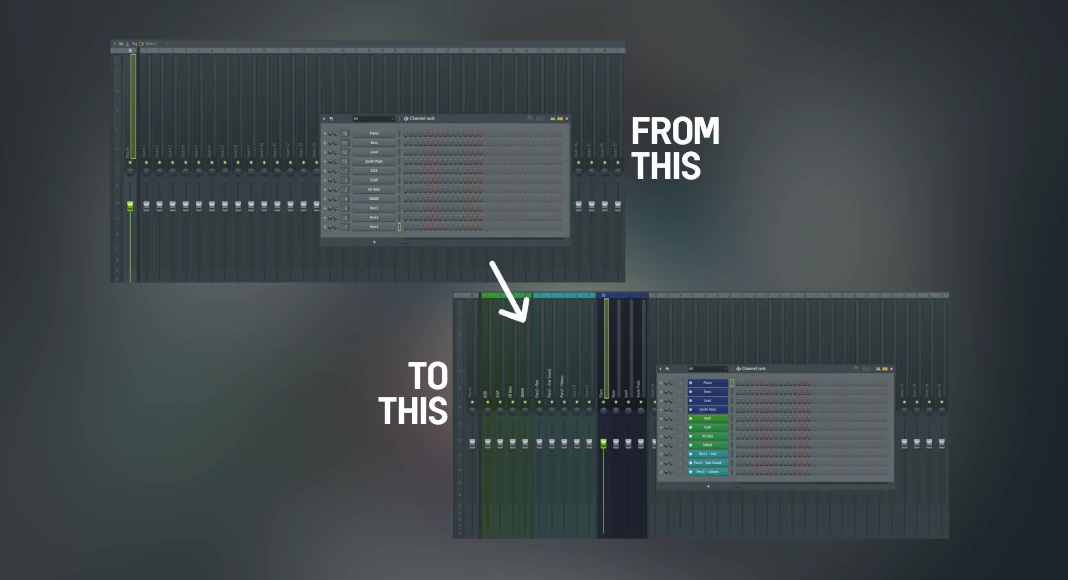
The outcome of this mixing and mastering setup inside FL Studio.
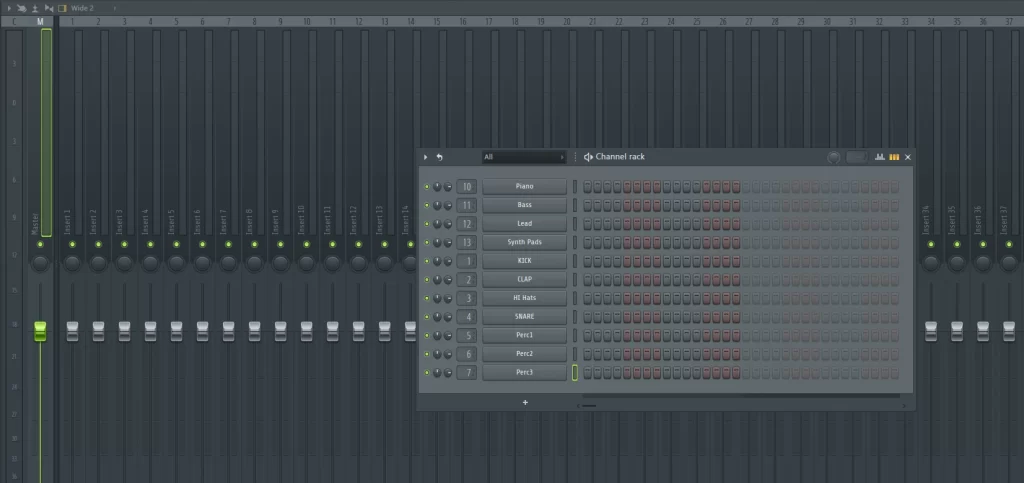
From a basic FL Studio mixer mastering setup (shown below).
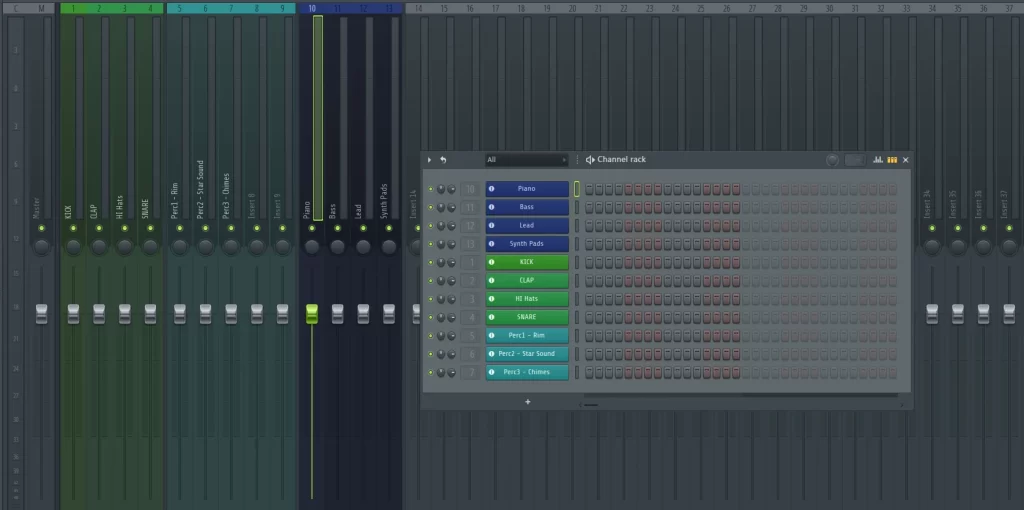
To an advanced FL Studio mixer mastering setup (shown below).
1. Number the channel rack samples and instruments accordingly and correctly.
For a smooth mixing and mastering process, it’s highly ideal to number your virtual or live instruments, including all drum samples or loops, correctly.
Most music producers often segment the drum samples into similar number ranges, and the same for instruments.
For example,
- Kick effects channel “1.”
- Clap effects channel “2.”
- Hi-Hats Effects channel “3.”
- All other drum samples 4-10, unless more than 10 drum samples are being used.
- Piano effects channel “11.”
- Bass effects channel “12.”
- Lead effects channel “13.”
- The rest of the instruments go from a range of 14-20, unless more than 10 instruments are being used.
For example, this is an unedited channel rack below, with drum samples and 4 sets of virtual instruments.
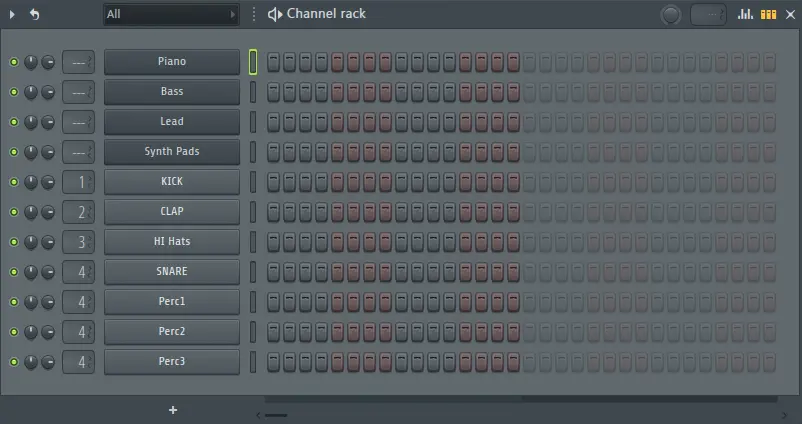 This would ideally look like something shown below; when numbered accordingly, check the image below.
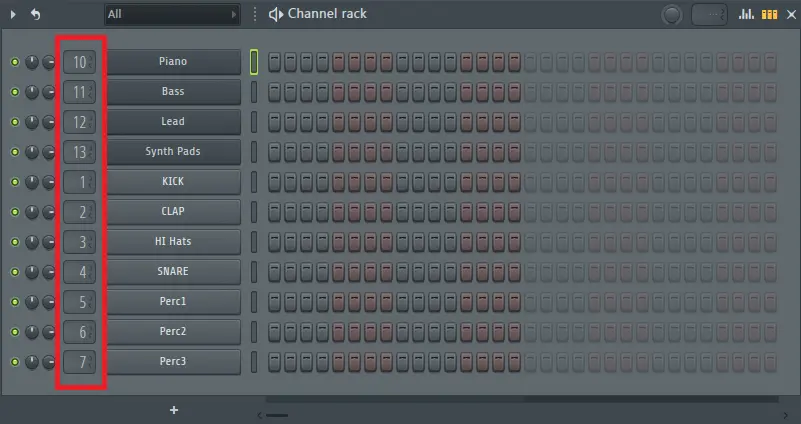 This process would make it much easier when it comes to mixing and mastering inside FL Studio.
2. Rename the channel rack samples or instruments to make the whole mixing and mastering process easier!
To rename any samples or instruments within the FL Studio channel stack, simply right-click and select “Rename… (highlighted in red below)” within the menu selection.
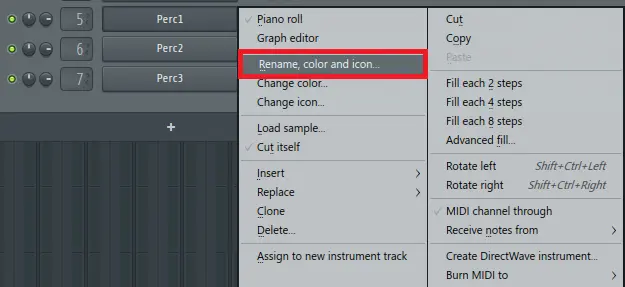 Then rename any samples or instruments accordingly; this is to make each sample, loop, or live or virtual instrument easier to identify when mixing and mastering.
 Then apply this same process to all instruments and samples that require this same procedure, as the example shown below.
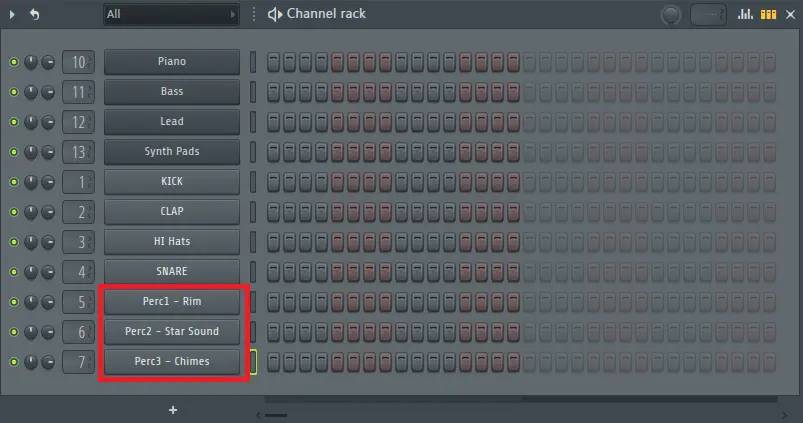 Renaming the channel rack samples and instrument names within the FL Studio channel rack will make the whole mixing and mastering process much easier. When these instruments and samples are named accordingly, it makes them much easier to identify.
3. Color-code the whole channel rack stack inside FL Studio.
Color coding and changing the color of the channel rack stack inside FL Studio will make the whole mixing and mastering process a lot easier.
Simply “right-click” on all the channel rack stacked samples and instruments, and select “change color.” This will allow each individual sample or instrument to be identified as a different color scheme. Check the image below for a reference, highlighted in red.
What’s the best way to color-segment the samples or instruments within FL?
- Try to keep all the instruments one main color.
- Try and keep all the main drum samples or loops one main color.
- Try and keep all the percussion one main color.
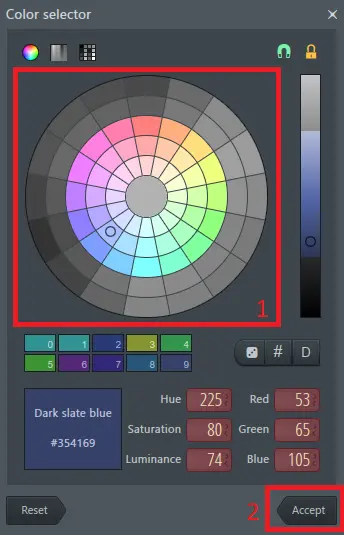
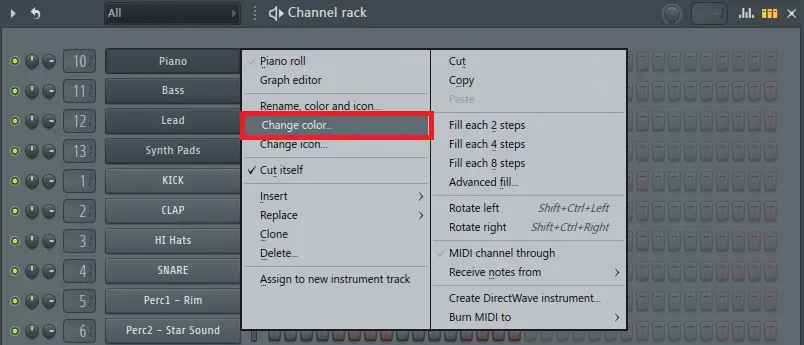 This will prompt the color picker menu to show up, which will enable a different color scheme for the selected sample or instrument within the FL channel rack.
Simply select your color, and click on “apply.” Then apply this same process to the whole channel rack, individually color-coding each drum sample, instrument, or loop.
 After the whole channel rack of drum samples, drum loops, and live or virtual instruments has been color-coded, it should look something similar to our example shown below. We have segmented the drums, percussions, and instruments to all have individual identical colors.
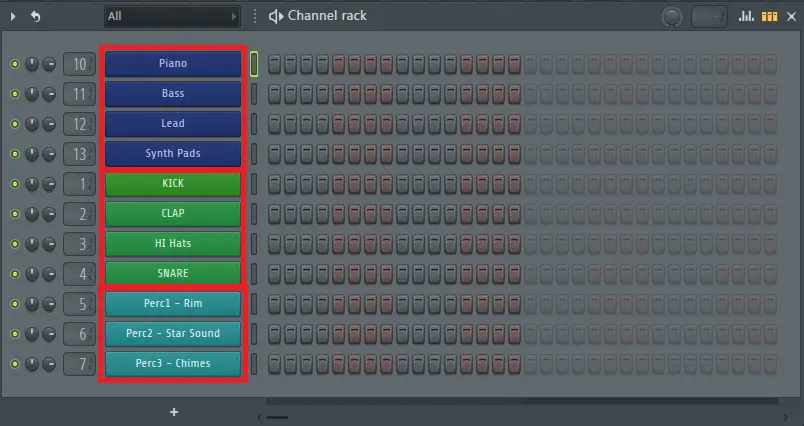 This whole color-coding process will make the whole mixing and mastering process a lot easier inside FL Studio.
This will also look a lot more visually pleasing, making it much easier to identify each instrument and sample, making the whole mixing and mastering process a lot faster.
4. Automatically assign each channel rack stack to the FL mixer.
Instead of changing all the colors within the FL Studio mixer manually and renaming each mixer channel to the assigned channel rack stack, this can be done automatically using an awesome feature within FL Studio.
The FL Studio mixer would look quite blunt without the automatic assign process. Check out the image below of the FL Studio channel mixer before we start this auto-assign process.
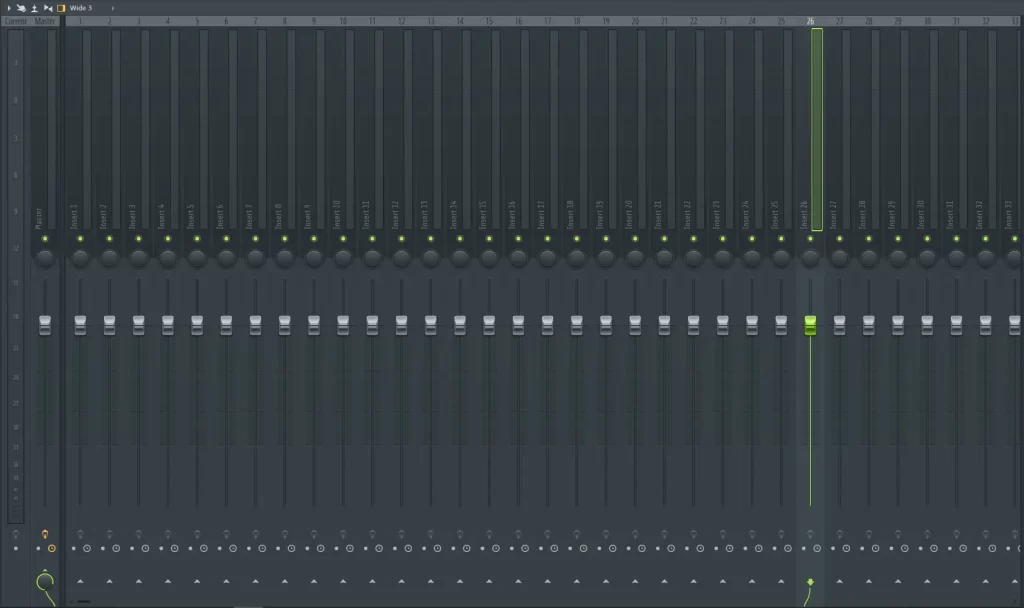 To assign the whole channel rack into the FL Studio channel mixer for mixing and mastering, there is an auto-assign procedure that will automatically add all the samples, instruments, and loops within the channel rack into the correct FL Studio mixer channel.
To set this up, simply right-click on the first sample or instrument located within the FL Studio channel stack, then select “assign to new instrument track.” This will automatically assign the segmented sample/instrument to the channel mixer, including the name and color.
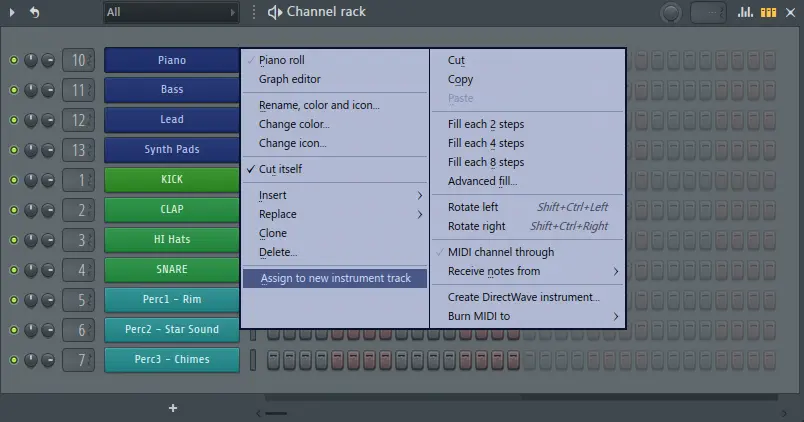 This will showcase an icon, which will indicate an auto-assigned procedure, shown and highlighted in red below.
![]() Then apply this same procedure to the whole channel stack; simply right-click on all the samples and instruments and assign them to a new instrumental track.
Then apply this same procedure to the whole channel stack; simply right-click on all the samples and instruments and assign them to a new instrumental track.
Which should lead to the FL Studio channel stack looking something like our example shown below.
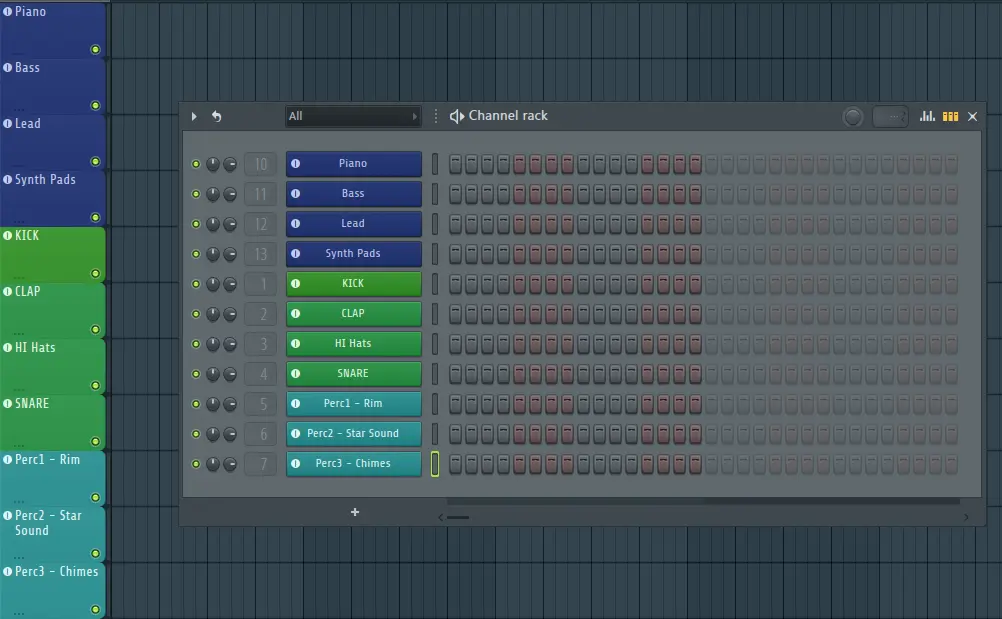 Also, the channel mixer inside FL Studio should be automatically updated; it should look like our example shown below.
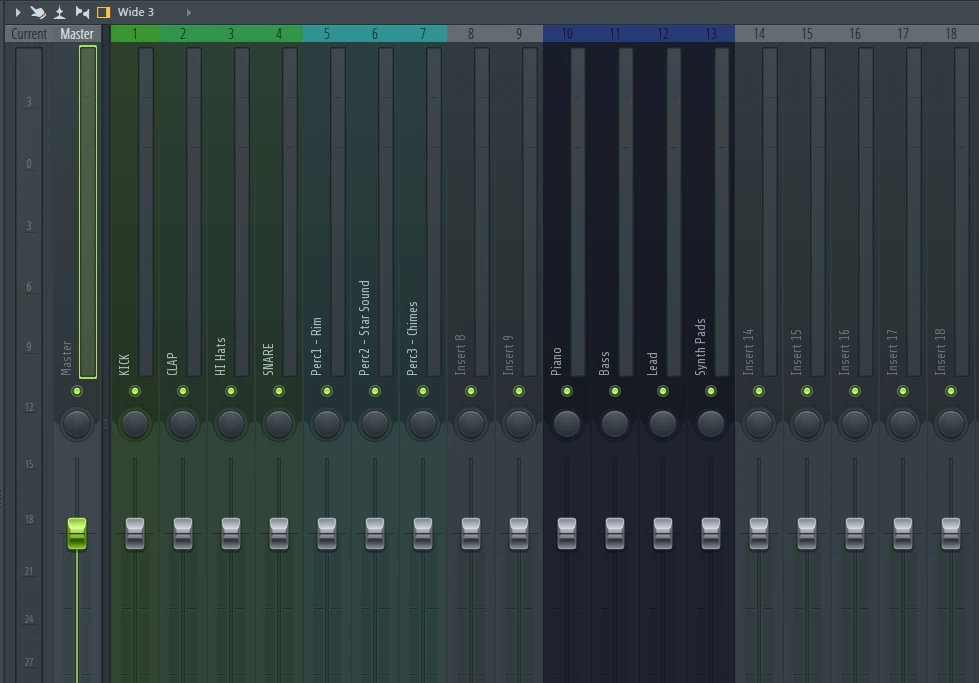 This whole process has made it much easier to identify each sample and instrument within the mixer. The color coding, which has been applied within the channel rack, has been automatically assigned inside the FL Studio mixer.
This will make the whole mixing and mastering process a lot easier inside FL Studio.
5. Segment the FL Studio mixer into groups.
Another great way to improve the mixing and mastering process is to segment mixer channels into groups, such as drums, percussion, instruments, loops, and so on.
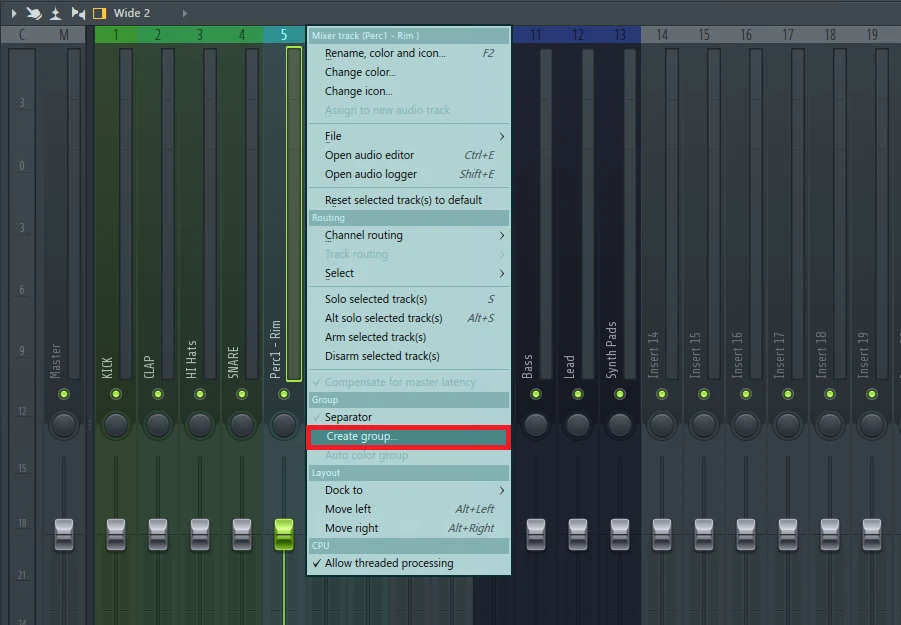
To do this, simply right-click on the 2nd start of the color-segmented group, and then select “create a group.” This will create a separation segment between different groups required within the FL Studio channel mixer. Check out the image below for a reference.
 Then, to add a name to the group, which should be kept the same, simply select the tick or press “enter” on the keyboard to assign the input name of the start of the group within the channel mixer within FL Studio.
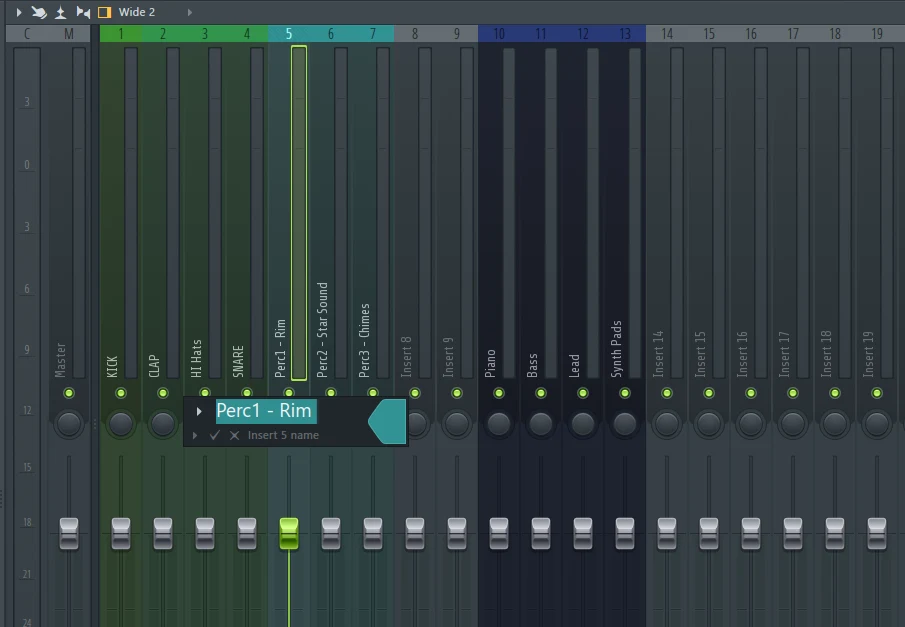 This will simply separate the groups inside the FL Studio channel mixer, as shown below.
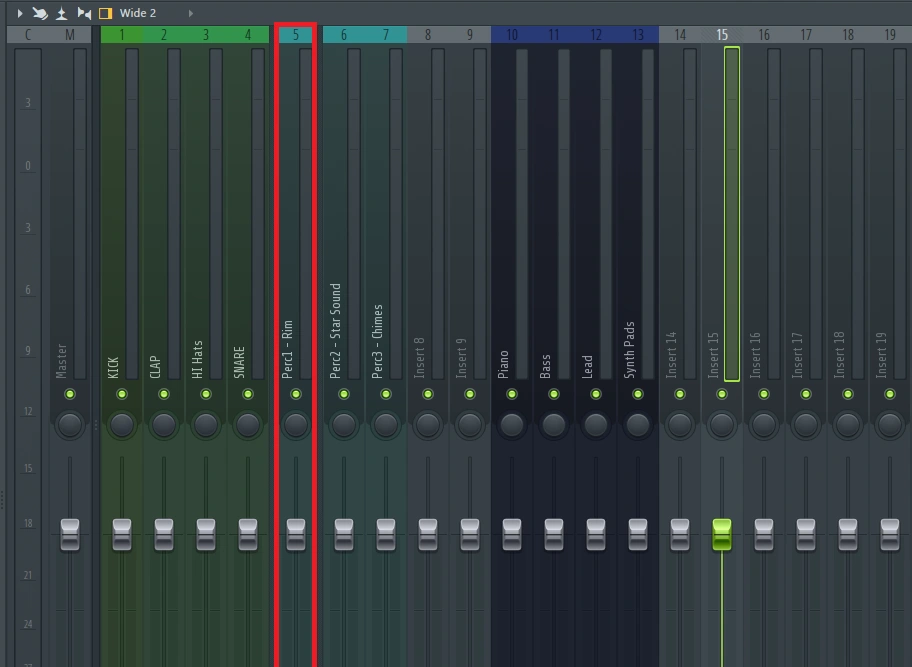 To clean this group segmentation up inside the FL Studio mixer, simply select the next channel to the right of the previous selection (as shown below) and deselect the “separator” option, which will remove the separator between the groups.
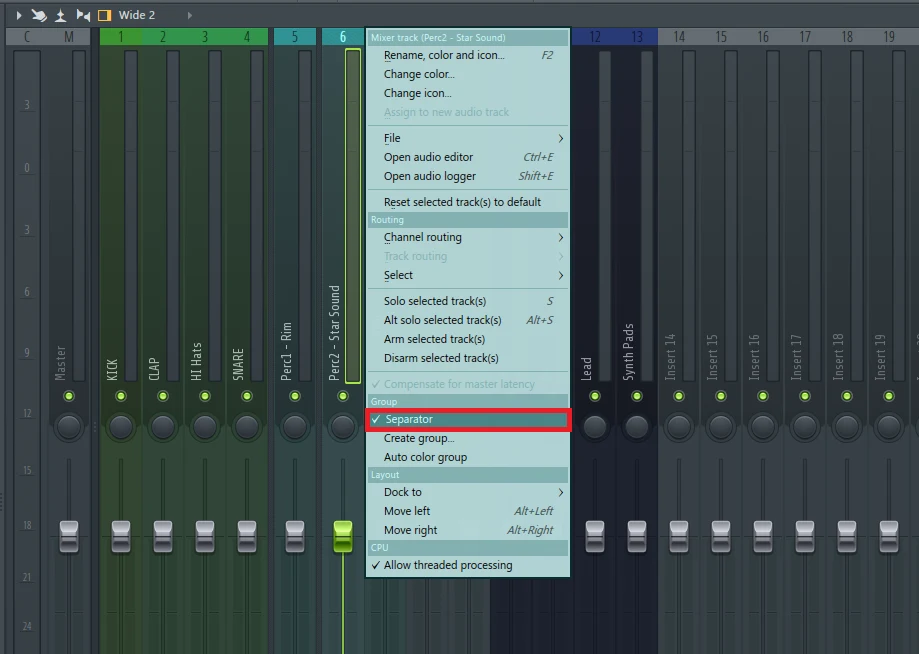 This will then remove the separation between the groups within the channel mixer in unwanted placement. Then apply the whole process again on different color groups as required till the FL Studio mixer has been fully grouped into the correct segmented groups as required. See the image below for a reference.
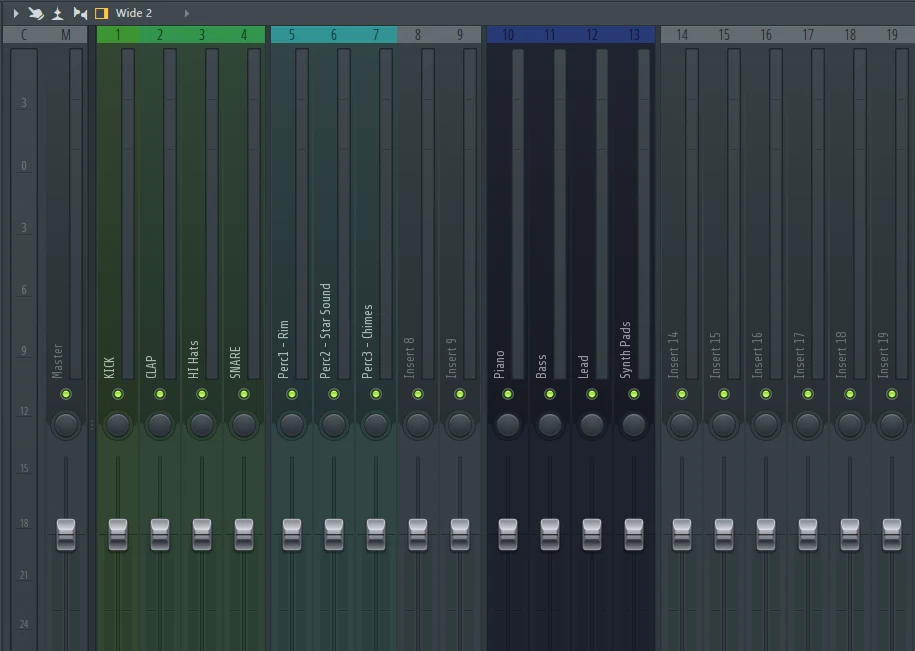 Also, it’s a lot easier to assign color to groups inside the channel mixer; simply right-click on any group channel within the channel mixer, then select “auto color group.” This will automatically assign the same color or add a new color if there is no present color scheme.
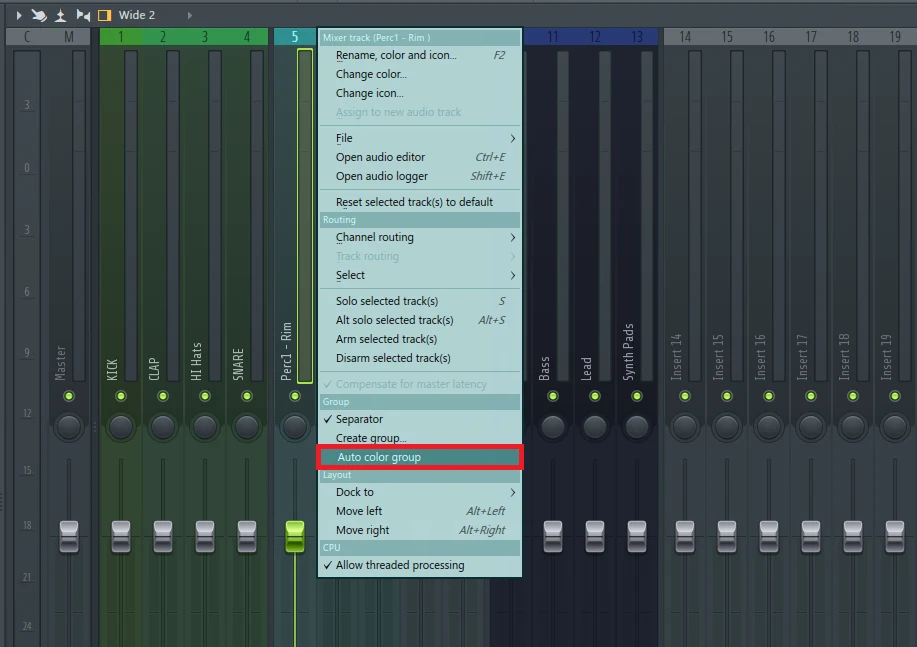 It’s as simple as that! FL Studio Mixer has been fully set up with groups.
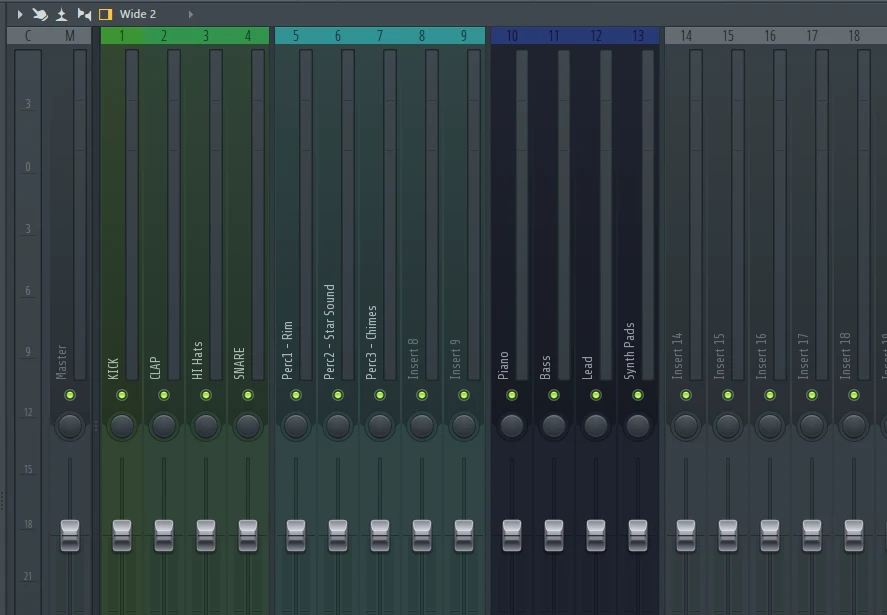 It’s as simple as that to segment different groups inside the FL Studio channel mixer; segmenting different groups will make it visually pleasing when mixing and mastering. Also, making the whole process a lot quicker, especially when it comes to identifying certain samples or instruments during the mastering process.


